
This guide shows how to setup your CiraSync On-Prem tenant after installation.
Before You Start
This guide assumes you have read and performed the procedure outlined in the following articles:
- CiraSync On-Prem UCM Pre-Requisites
- Preparing Your Windows Server for CiraSync On-Prem UCM
- CiraSync On-Prem Installation Guide
Instructions
- Click Service Mailbox Setup tile in the CiraSync On-Prem UCM install wizard. (See figure below.)

- Select your tenant’s Exchange environment. In this example, select Exchange. The Select Microsoft Exchange service account section of the wizard will appear. (See figure below.)
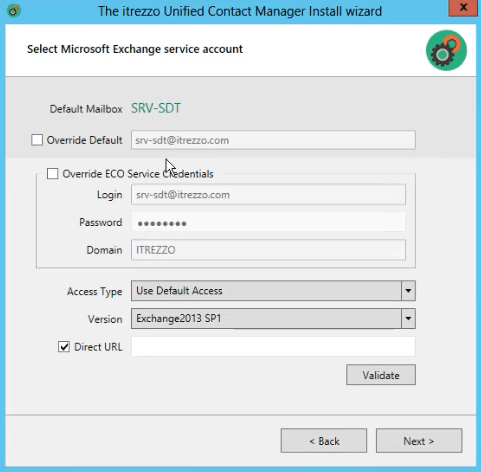
- Enter the direct URL to your tenant’s Exchange database in the Direct URL field in the following format: https://<mail.server>/ews/exchange.asmx. NOTE: mail.server is a placeholder for the name of your Exchange server.
- Click Validate. A pop-up will appear.
- Click OK to close the pop-up.
- Click Next. The Contact info window will open. (See figure below.)
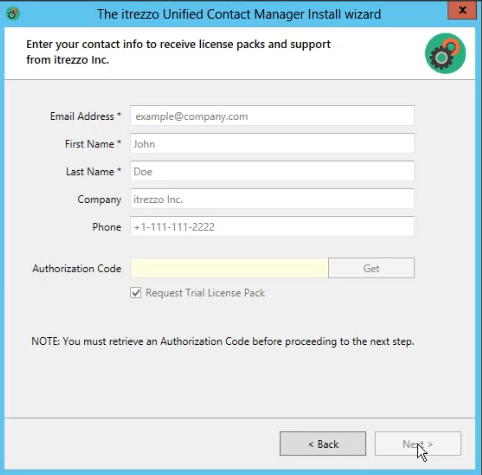
- Enter the desired email address to serve as the BOP/CiraSync On-Prem admin in the Email Address field. Information from the GAL will fill out the rest of the form.
- Click Get in the Authorization Code field.
- Click the Request Trial License Pack checkbox.
- Click Next. CiraSync On-Prem will send two emails, one is a generic message confirming the CiraSync On-Prem UCM registration, and the other will contain the authorization code used for CiraSync On-Prem and the trial license pack. NOTE: CiraSync On-Prem offers users 6-month trial license pack of 10 licenses. To activate the trial license pack, please follow the instructions outlined in the automated email or in How to Install CiraSync On-Prem UCM License Packs.
- Check the Start all services and Launch Web Administrator checkboxes.
- Click Finish.
