This guide shows how to prepare your server for CiraSync On-Prem UCM to ensure the smoothest transition into using the product.
Note: Skip these instructions for cloud only configuration (regarding Azure AD and syncing directly to Office 365 mailboxes). For such configuration, the system account will be used to start CiraSync On-Prem services and CiraSync On-Prem server Admin user to access CiraSync On-Prem Admin application. Additional role based users can be added using CiraSync On-Prem Admin Security configuration.
Instructions
Adding the Service Account to the CiraSync On-Prem Server
- Launch Computer Management.
- Expand Local Users.
- Select Groups.
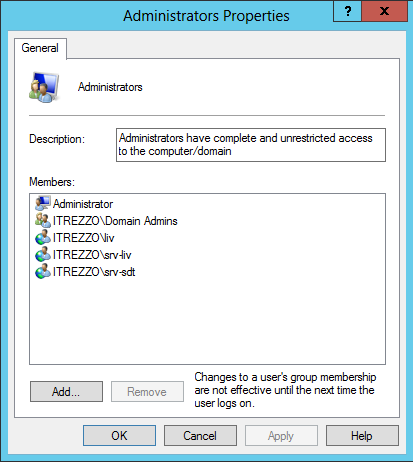
- Right-click Administrators > Add to Group. The Administrator Properties will open. (See figure below.)
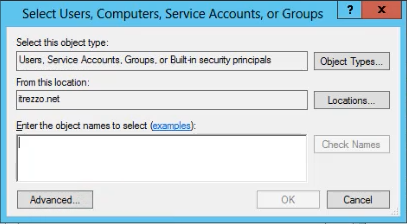
- Click Select User. The Select User window will appear.
- Add the service account that was created for CiraSync On-Prem in Enter the object names to select.
- Click the Check Names button > OK.
- Click Apply > OK.
Setting the Service Account to “Log on as a Service”
- Open the Run command prompt.
- Input the secpol.msc command.
- Click OK. The Local Security Policy window will open. (See figure below.)
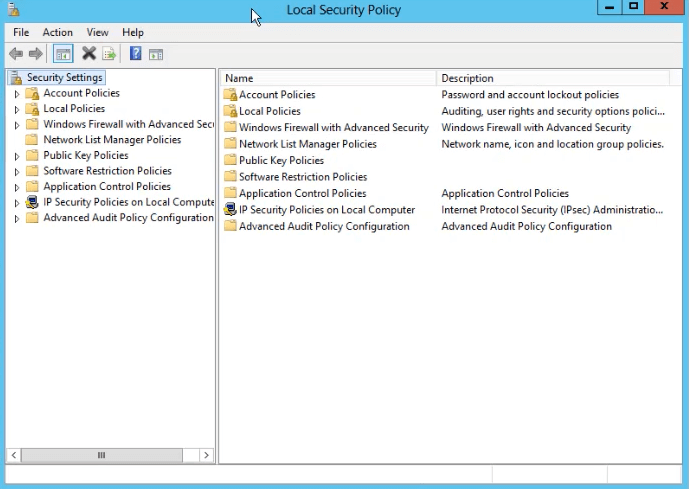
- Expand Local Policies > Select User Rights Assignment.
- Click Add User or Group. The Select Users or Groups window will appear. (See figure below.)